This is Part 1 of the "Setting Up TypeScript with Node.js" series, where I'll guide you through creating a production-ready TypeScript and Node.js application. Future parts will cover project structure, Docker configuration, testing, deployment, and advanced patterns.
As a Design Engineer, I've found that a proper TypeScript and Node.js setup is crucial for smooth development. Whether you're building a REST API or adding a backend to your TypeScript frontend, having a consistent language across your stack improves team collaboration and code maintainability.
In this guide, I'll walk you through setting up a TypeScript Node.js project from scratch, sharing insights and best practices I've learned along the way.
Defining Clear Goals
Before diving into the technical setup, let's outline what we want to achieve:
- Set up a Node.js project with TypeScript support
- Configure proper development tooling
- Add support for linting and code formatting
Prerequisites
Before we begin, ensure you have:
- Node.js installed (LTS version recommended)
- A code editor (I use VS Code for its excellent TypeScript support)
- Basic familiarity with JavaScript and any npm
- I'm using
yarnas my node package manager, to useyarn, first install it, Digital Ocean has a simple guide you can follow or you can simimply usenpmwhich comes with Node.js out of the box.- When using
npmto follow this guide, replace the yarn command with npm commands. - I found this post on GeekForGeek website what shares the differences between
yarnandnpm
- When using
Getting Started
Let's start by creating a new project directory and initializing it. Open your terminal and run:
mkdir ts-node-demo
cd ts-node-demo
yarn init -y
Now, let's install TypeScript and its supporting packages:
yarn add -D typescript @types/node ts-nodeLet's break down what each package does:
typescript: The TypeScript compiler that converts your TypeScript code into JavaScript@types/node: Provides type definitions for Node.js built-in modules (like fs, path, http, etc.)ts-node: Allows you to run TypeScript files directly without manually compiling them first. Think of it as a TypeScript execution engine for Node.js
Now, let's add nodemon for development:
yarn add -D nodemonnodemon is a utility that will monitor your source files for changes and automatically restart your application. This is particularly useful during development as you won't need to manually restart your Node.js application every time you make changes.
TypeScript Configuration
TypeScript needs a configuration file (tsconfig.json) to work effectively. This file tells TypeScript how to compile your code, which features to enable, and how strict the type checking should be. Without this configuration, TypeScript would use default settings that might not suit your project needs.
Create the configuration file by running:
npx tsc --initI prefer using these settings in tsconfig.json:
{
  "compilerOptions": {
    "target": "ES2020",
    "module": "commonjs",
    "lib": ["ES2020"],
    "strict": true,
    "esModuleInterop": true,
    "skipLibCheck": true,
    "forceConsistentCasingInFileNames": true,
    "outDir": "./dist",
    "rootDir": "./src",
    "moduleResolution": "node"
  },
  "include": ["src/**/*"],
  "exclude": ["node_modules"]
}
Project Structure
With the configuration in place, let's set up our project structure:
mkdir src
touch src/index.ts
Update your package.json with these helpful scripts:
{
  "scripts": {
    "start": "node dist/index.js",
    "dev": "nodemon --exec ts-node src/index.ts",
    "build": "yarn tsc",
    "watch": "yarn tsc -w"
  }
}
Testing The Setup
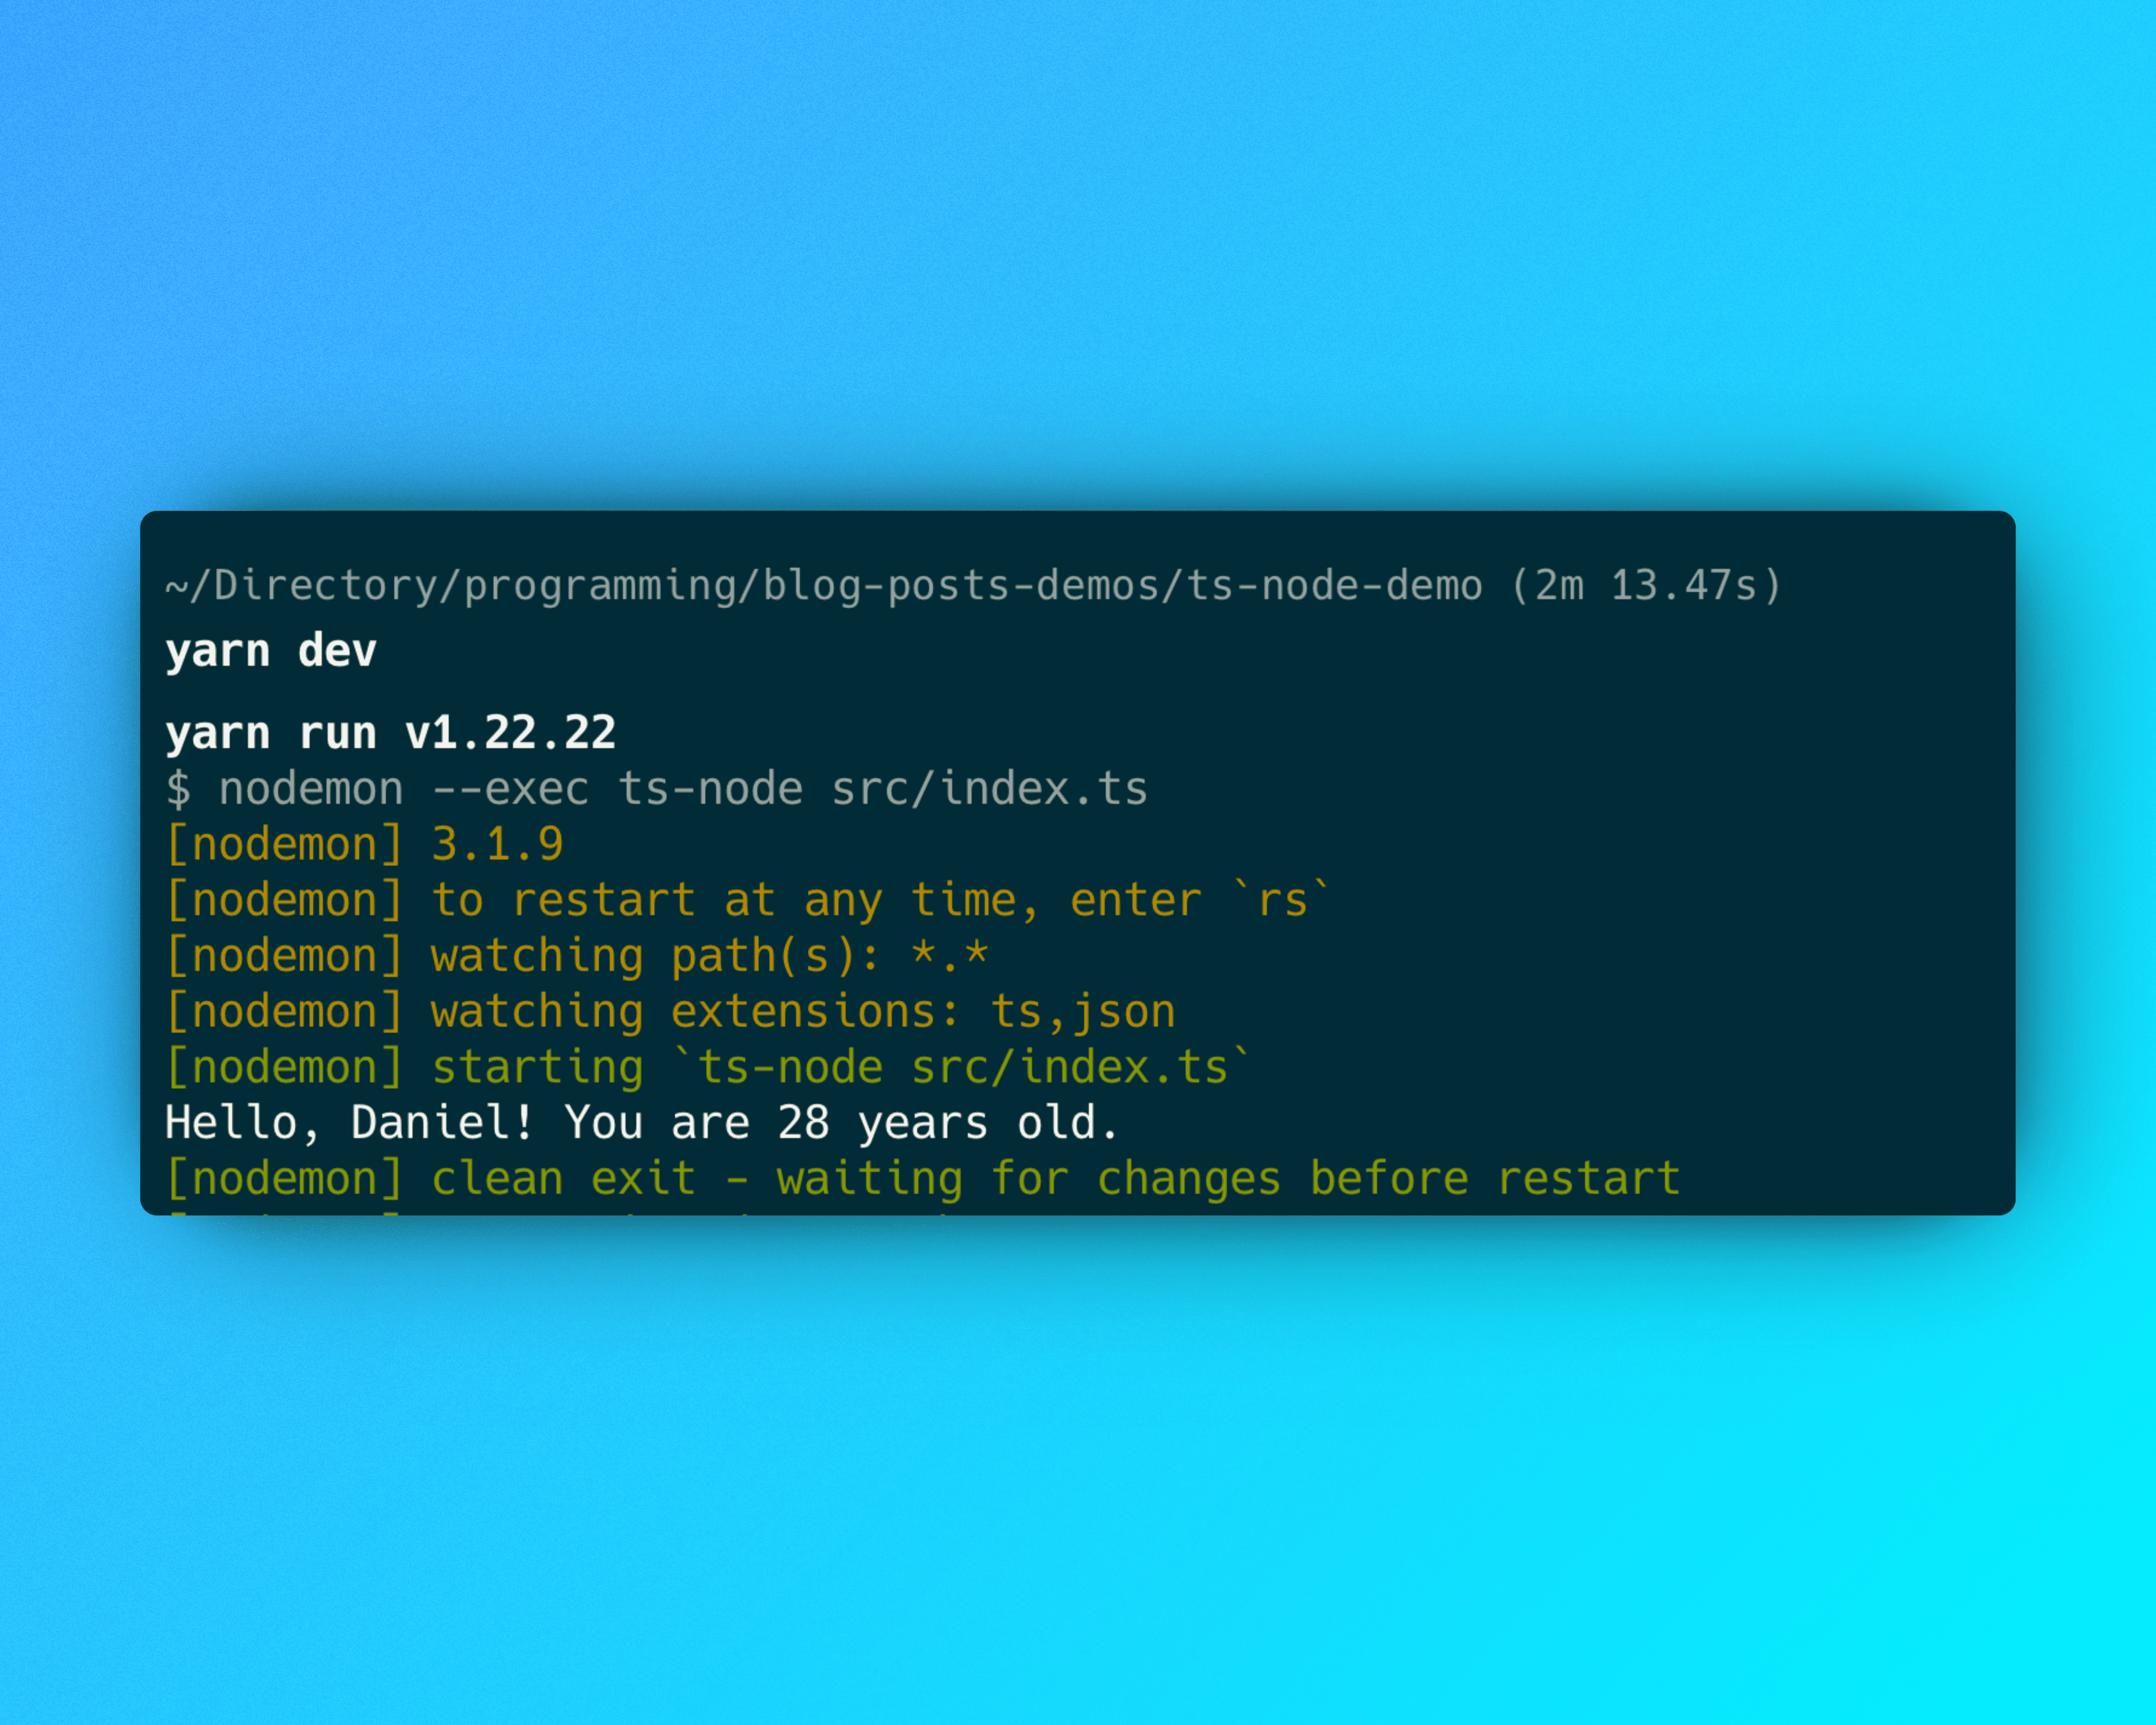
Let's create a simple example in src/index.ts and use yarn dev to start the dev server and compile the ts file, which will console log Hello, Daniel! You are 28 years old. in the terminal.
At this point, typescrtipt and nodejs it working correctly and our code is being compiled and served correctly.
interface User {
  name: string;
  age: number;
  email: string;
}

function greetUser(user: User): string {
  return `Hello, ${user.name}! You are ${user.age} years old.`;
}

const user: User = {
  name: "Daniel",
  age: 28,
  email: "daniel@example.com"
};

console.log(greetUser(user));
You can also run yarn build to compile the code completely to js and use yarn start to start the execute the js file.
Basic Development Tools
To enhance our development experience, I recommend adding ESLint and Prettier:
Set up eslint
ESLint is very useful for keeping your code well formatted and avoiding certain common issues when writing code. I prefer to use a consistent formatting for most of my JavaScript projects, even when I'm working with React with Vite, Next.js and React Native.
- Install ESLint and its TypeScript dependencies:
yarn add -D eslint typescript-eslint eslint-plugin-import prettier eslint-plugin-prettier eslint-config-prettierLet's break down what each package does:
eslint: The core linting tool that helps find and fix problems in your code by enforcing consistent coding styles and catching potential errors.typescript-eslint: A complete toolset for TypeScript and ESLint integration, providing both the parser to understand TypeScript code and rules specific to TypeScript.prettier: An opinionated code formatter that automatically formats your code to maintain consistent style throughout your project.eslint-plugin-import: Provides rules for validating proper imports, exports, and module usage. It helps maintain consistent import ordering and prevents invalid import paths.eslint-plugin-prettier: Runs Prettier as an ESLint rule and reports differences as ESLint issues. This means you can use Prettier for code formatting through ESLint.eslint-config-prettier: Turns off all ESLint rules that might conflict with Prettier. This ensures that ESLint and Prettier work together smoothly without fighting over code formatting.
- Create the configuration file in the root directory of your project to contain the eslint configuration:
touch eslint.config.js- Add this configuration to
eslint.config.js:
This is my personal recommendation, but feel free to adjust the formatting and linting rules to match your preferences or project requirements. Here's what makes this configuration special:
- Built-in Prettier Integration: No need for a separate Prettier setup! The configuration includes Prettier rules right inside ESLint, giving you consistent code formatting with just one tool.
- Organized Imports: The config automatically organizes your import statements into logical groups and alphabetizes them. Trust me, once you get used to having your imports neatly organized, you'll never want to go back!
- Smart File Ignoring: We've included patterns to ignore common directories and files like node_modules, build outputs, and system files. This keeps your linting fast and focused on your actual source code - because nobody wants to wait an hour for ESLint to check through node_modules 😅
import eslint from '@eslint/js'
import tseslint from 'typescript-eslint'
import prettier from 'eslint-config-prettier'
import eslintPluginPrettier from 'eslint-plugin-prettier'
import importPlugin from 'eslint-plugin-import'

export default tseslint.config(
  eslint.configs.recommended,
  ...tseslint.configs.recommended,
  {
    files: ['src/**/*.ts'],
    plugins: {
      import: importPlugin,
      prettier: eslintPluginPrettier
    },
    rules: {
      'prettier/prettier': [
        'error',
        {
          semi: false,
          trailingComma: 'none',
          singleQuote: true,
          printWidth: 80,
          tabWidth: 2,
          useTabs: false,
          endOfLine: 'lf',
          arrowParens: 'always',
          bracketSpacing: true,
          quoteProps: 'as-needed',
          proseWrap: 'preserve'
        }
      ],
      '@typescript-eslint/explicit-function-return-type': 'off',
      '@typescript-eslint/no-explicit-any': 'warn',
      '@typescript-eslint/no-unused-vars': [
        'warn',
        {
          argsIgnorePattern: '^_',
          varsIgnorePattern: '^_'
        }
      ],
      'import/order': [
        'error',
        {
          groups: [
            ['builtin', 'external'],
            'internal',
            ['parent', 'sibling'],
            'index'
          ],
          'newlines-between': 'always',
          alphabetize: {
            order: 'asc',
            caseInsensitive: true
          }
        }
      ],
      semi: ['error', 'never']
    },
    languageOptions: {
      ecmaVersion: 2020,
      sourceType: 'module',
      parser: tseslint.parser,
      parserOptions: {
        project: './tsconfig.json'
      }
    },
    settings: {
      'import/resolver': {
        typescript: {},
        node: {
          extensions: ['.js', '.ts']
        }
      }
    },
    ignores: [
      'dist/**', 'build/**',      // Build outputs
      'node_modules/**',          // Dependencies
      'coverage/**',              // Test coverage
      'logs/**', '*.log',         // Logs
      '.DS_Store',                // System files
      '.idea/**', '.vscode/**',   // IDE files
      '*.min.js'                  // Minified files
    ]
  },
  prettier
)- Add
"type": "module",to yourpackage.jsonto ensure Node.js treats all .js files as ES modules instead of CommonJS. This is necessary because our ESLint config uses ES module imports. Your package.json should include:
{
  "name": "your-project-name",
  "version": "1.0.0",
  "type": "module",
  // ... other configurations
}- Add these scripts to your
package.jsonto run the linting from terminal:
{
  "scripts": {
    "lint": "eslint .",
    "lint:fix": "eslint . --fix",
  }
}
Let's break down what each script does:
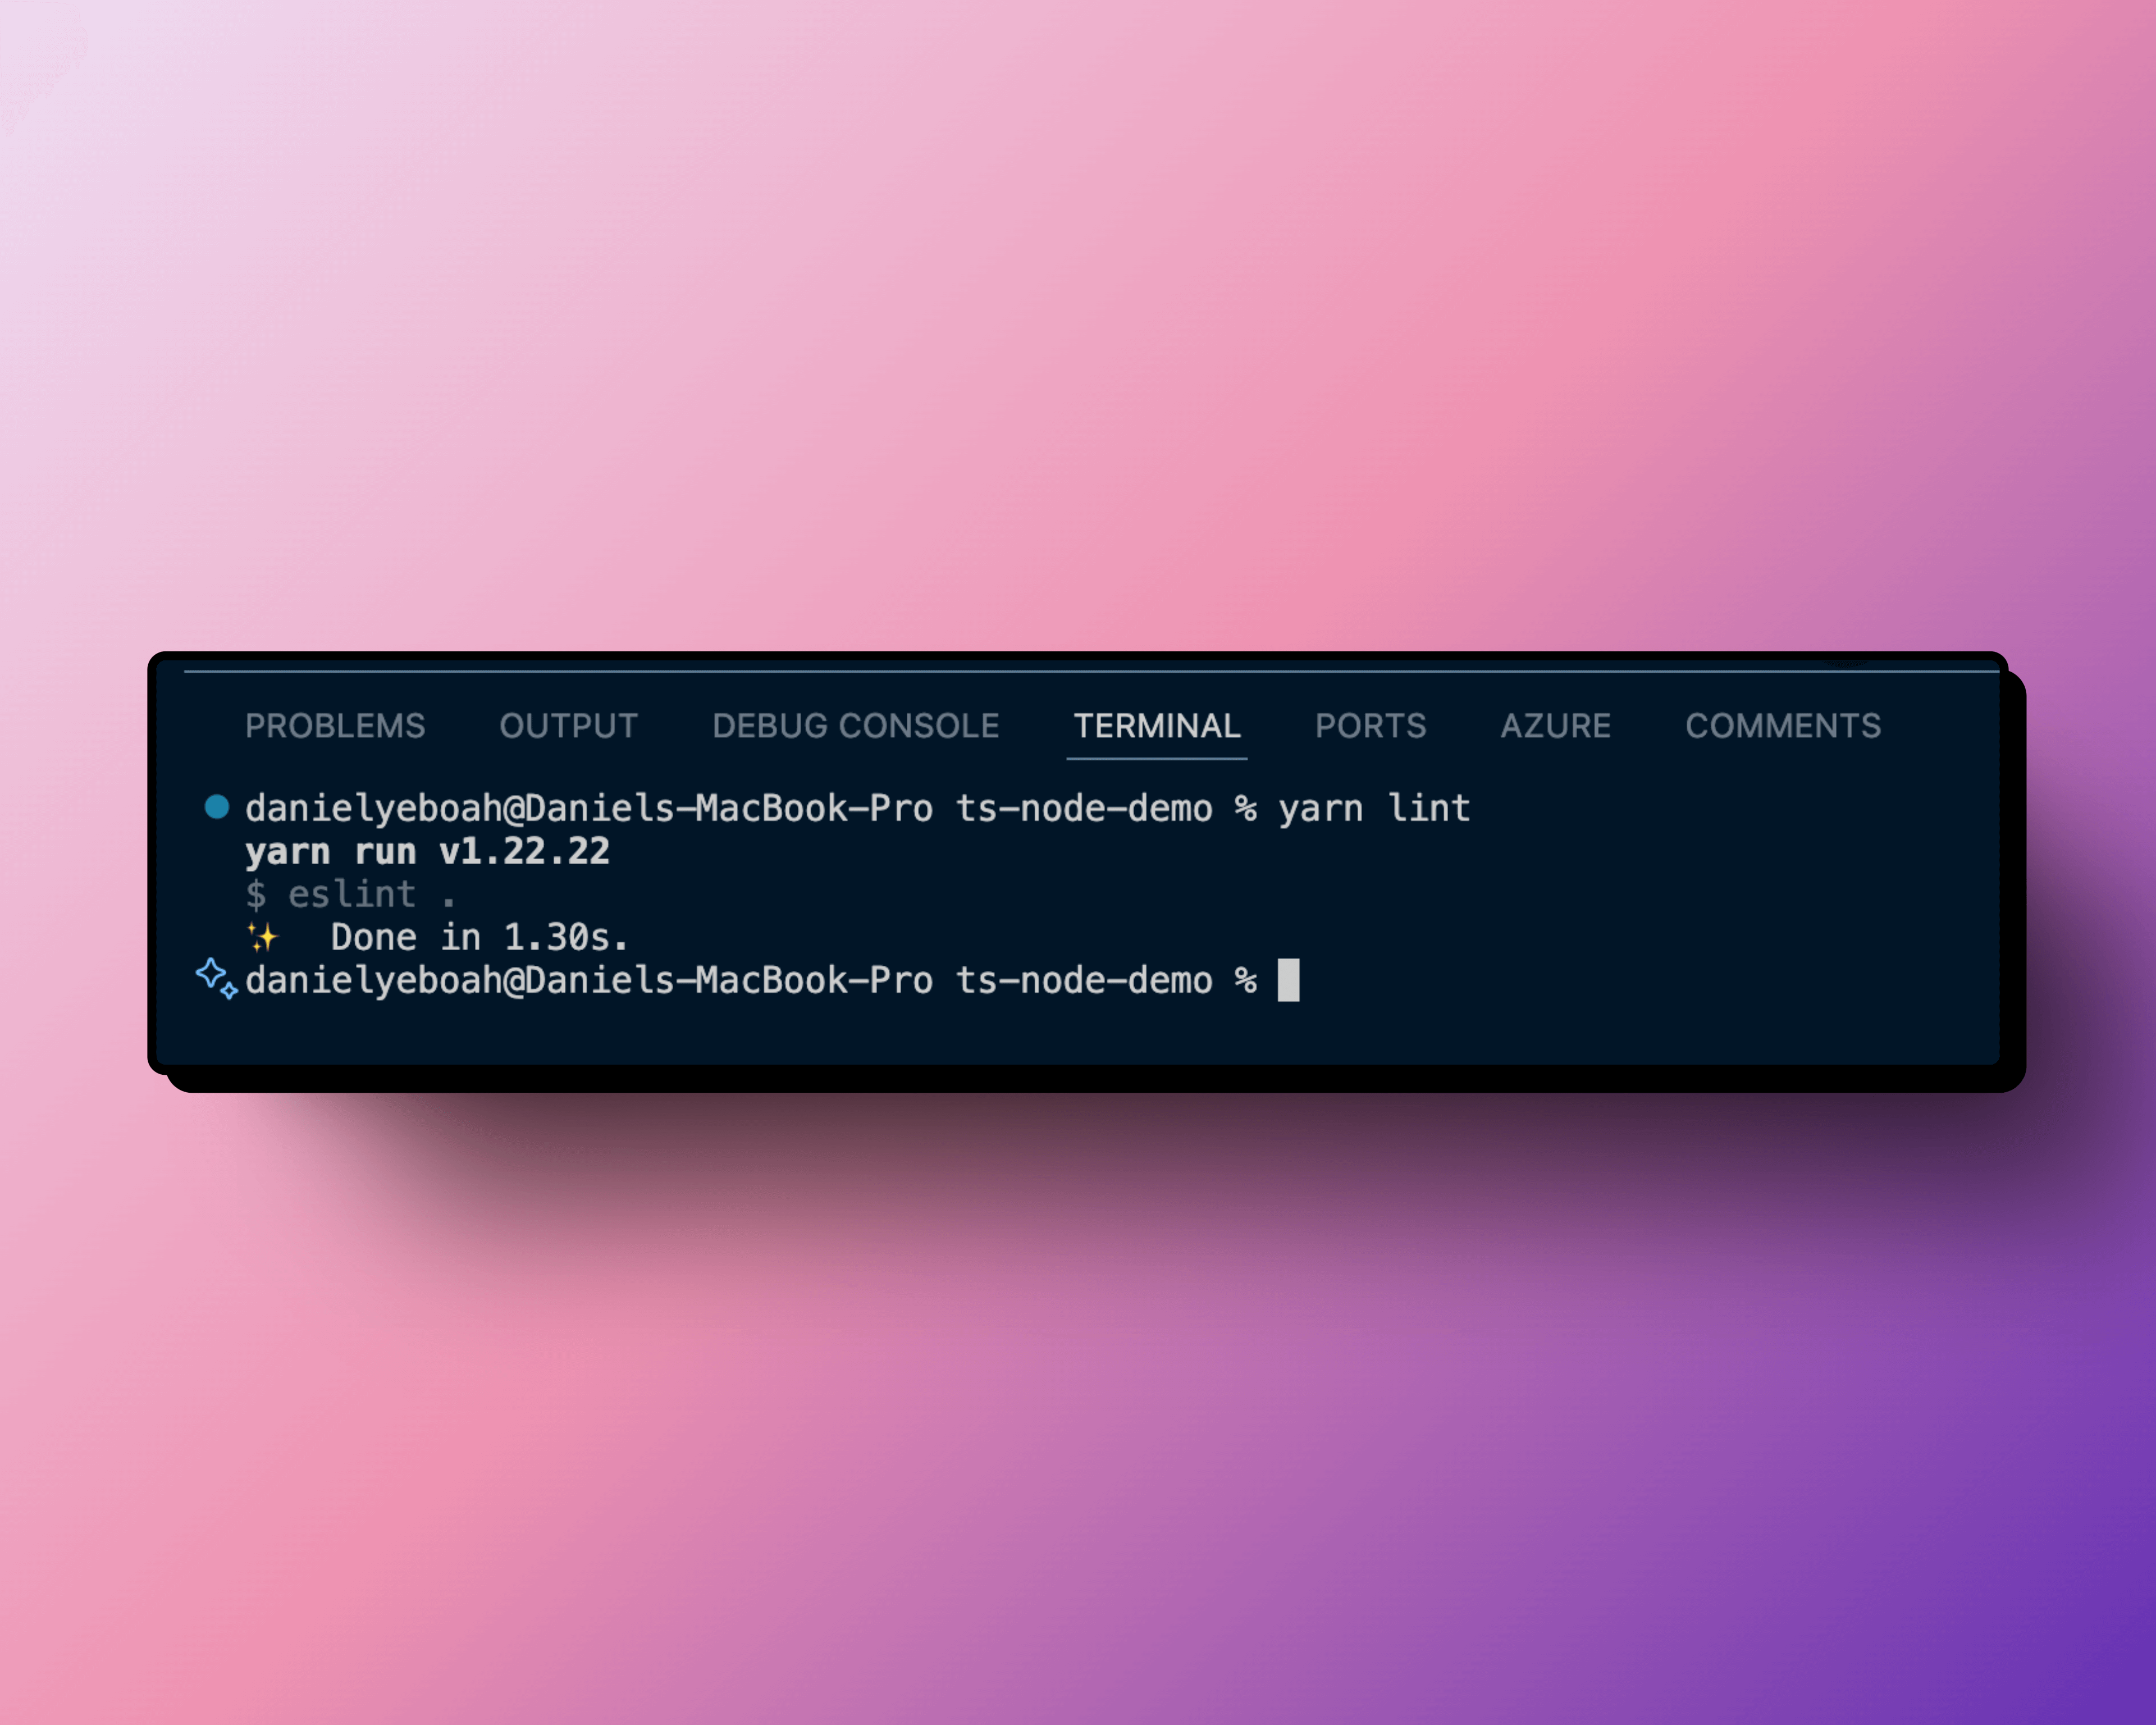
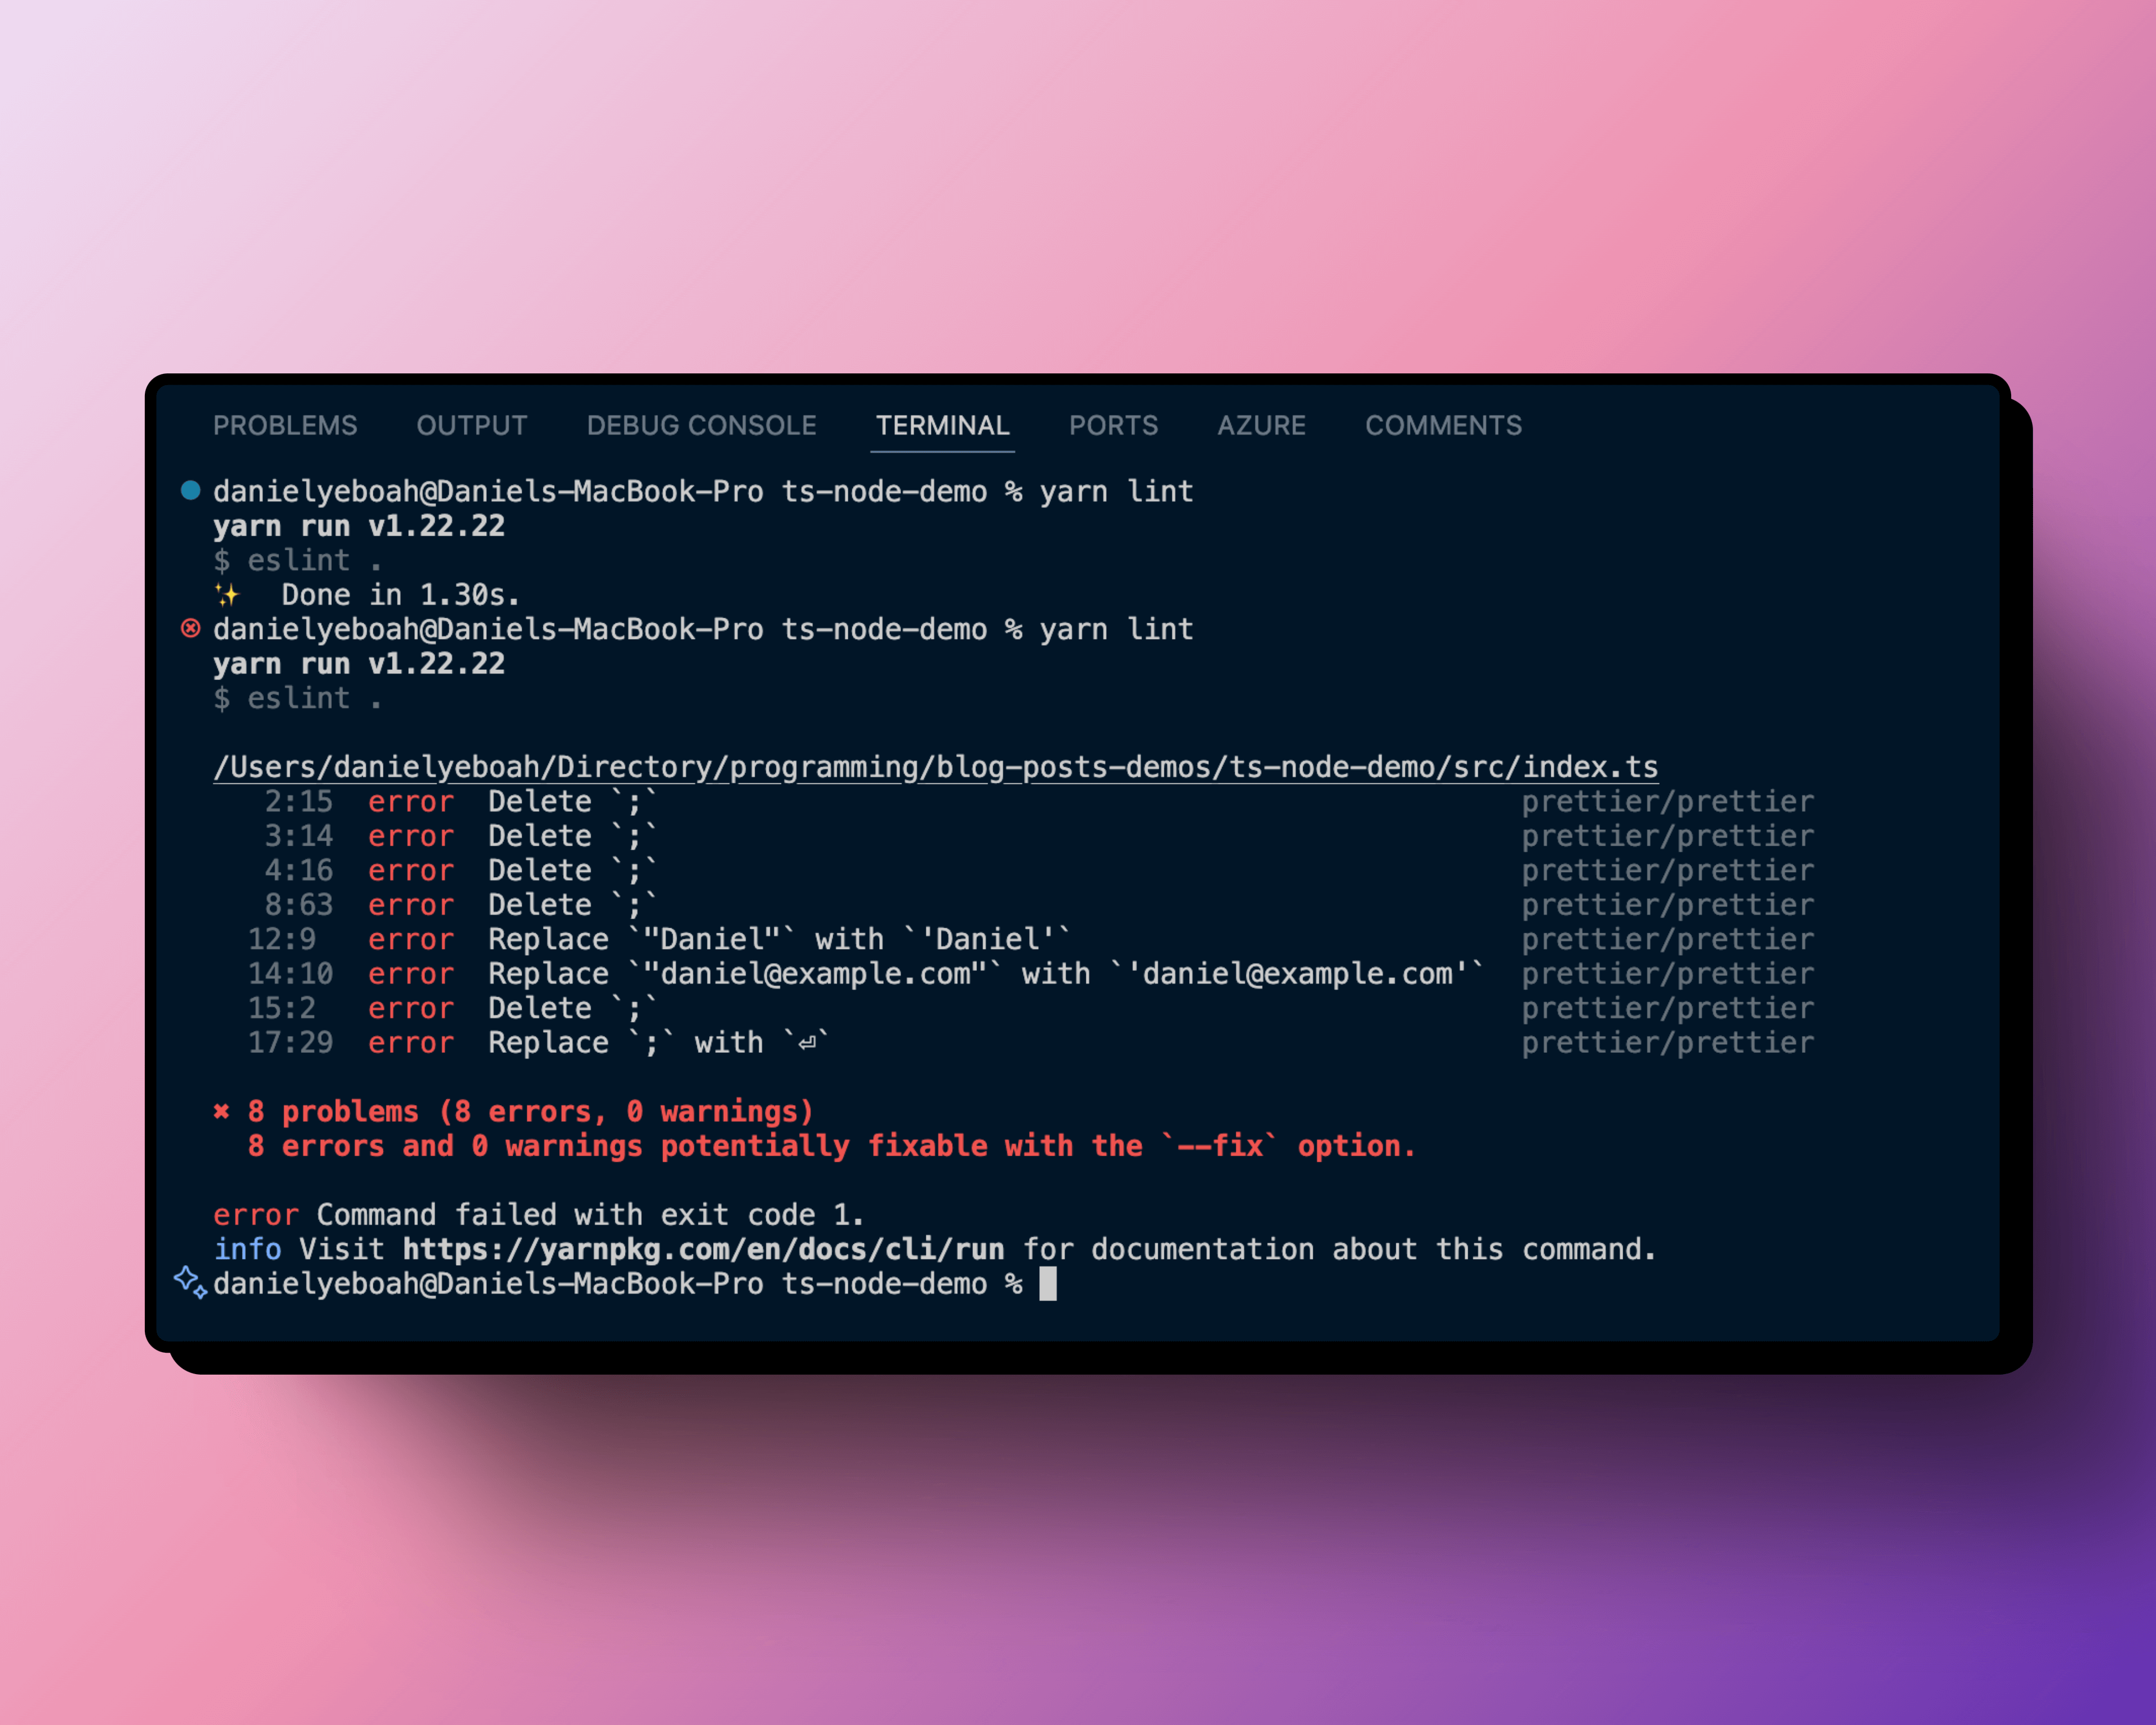
yarn lint- Checks for linting issuesyarn lint:fix- Automatically fixes linting issuesyarn format:check- Checks if files need formatting without making changesyarn format- Formats all TypeScript files in your project
Now you can safely write code and use these commands to test your code and also add them to your CI/CD to ensure there is consistent styling for the project and team.
Conclusion
Setting up a TypeScript Node.js project from scratch gives you complete control over your development environment and helps you understand each piece of your tooling. While React projects often come with pre-configured setups, building a Node.js project from the ground up lets you create a lightweight, customized foundation that perfectly fits your needs.
What We've Achieved
- Set up a basic Node.js project with TypeScript support
- Configured ESLint for code quality and consistency
- Integrated Prettier for automatic code formatting
- Created a maintainable and scalable project structure
Future Improvements
There are several ways to enhance this setup further:
- Pre-commit Hooks: Implement tools like Husky to run linting and formatting checks before each commit, ensuring code quality across your team.
- Project Templates: Create a reusable template or CLI tool to quickly scaffold new TypeScript Node.js projects with this configuration. This would be especially useful when building microservices where consistent setup across multiple services is crucial.
- Continuous Integration: Add GitHub Actions or similar CI/CD workflows to automate these checks in your development pipeline.
Connect and Share
I'm always looking to learn from the community! If you have suggestions for improving this setup or experience with similar tools, I'd love to hear from you. Feel free to:
- Connect with me on LinkedIn
- Share your thoughts in the comments on the LinkedIn post
Remember, good tooling should enable productivity, not hinder it. This setup aims to provide a solid foundation that you can build upon for your specific needs.